
The Basics of Block Printing on Fabric and Paper
Block printing is one of the oldest and most beautiful forms of surface design, practiced across cultures for centuries. From traditional Indian textiles to handmade stationery, block printing celebrates craftsmanship, patience, and creativity. Whether done on fabric or paper, this art form allows you to create repeating patterns and unique designs using hand-carved blocks. Understanding the basics of block printing helps beginners appreciate the process while gaining confidence to start creating their own prints.
What Is Block Printing?
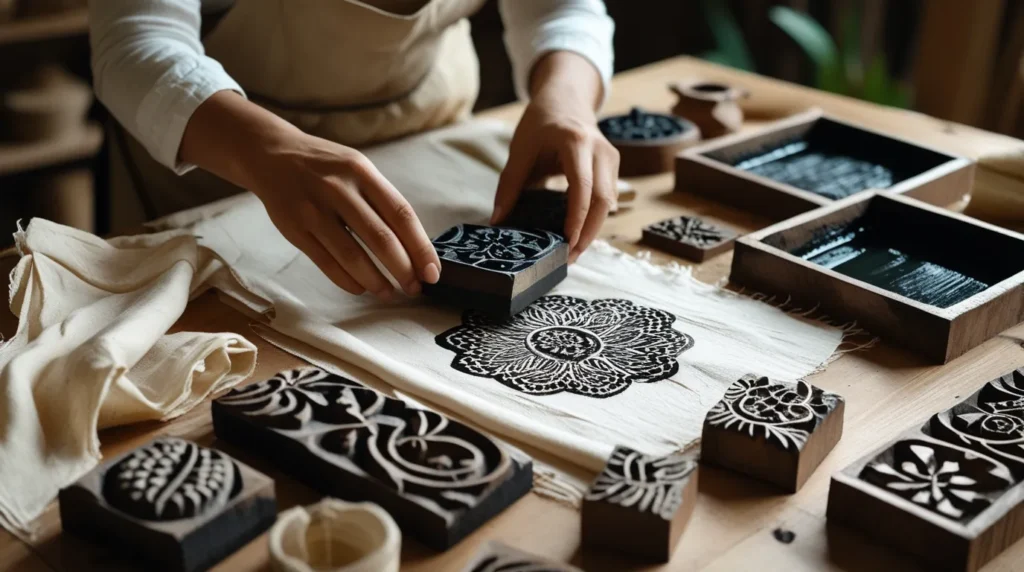
Block printing is a manual printing technique where designs are carved onto blocks (usually wood or linoleum), coated with ink or dye, and pressed onto a surface such as fabric or paper.
Key Characteristics:
- Handmade and imperfect by nature
- Each print is unique
- Relies on pressure, alignment, and rhythm
- Encourages slow, mindful creativity
Materials Needed for Block Printing
For Both Fabric and Paper
- Carved printing blocks (wood or linoleum)
- Fabric paints or printing inks
- Flat tray or palette
- Soft sponge or brayer (roller)
- Clean cloths or newspapers
- Gloves and apron
Additional for Fabric Printing
- Natural fabric (cotton, linen, silk)
- Fabric fixer or heat setting method
- Iron
Additional for Paper Printing
- Thick paper (handmade, cartridge, watercolor)
- Smooth working surface
Types of Blocks Used
- Wood blocks: Traditional, durable, rich texture
- Linoleum blocks: Easier for beginners, smoother lines
- Rubber blocks: Soft and flexible, good for fine detail
Block Printing on Fabric
Step-by-Step Basics
- Wash and dry fabric to remove sizing
- Iron the fabric for a smooth surface
- Apply fabric paint evenly onto the block
- Press the block firmly onto fabric
- Lift gently to reveal the print
- Repeat the pattern carefully
- Let dry completely and heat set
Tips for Fabric Printing
- Use light-colored fabrics for best results
- Maintain even pressure while stamping
- Practice alignment before final printing
- Allow proper drying time between layers
Block Printing on Paper
Step-by-Step Basics
- Choose thick, absorbent paper
- Apply ink lightly to avoid smudging
- Press block evenly without sliding
- Lift straight up
- Let prints dry flat
Tips for Paper Printing
- Less ink gives cleaner results
- Test prints before final work
- Use gentle pressure to avoid bleeding
- Allow full drying before stacking papers
Common Block Printing Patterns
- Floral motifs
- Geometric designs
- Nature-inspired shapes
- Repeating borders
- Traditional cultural patterns
Mistakes Beginners Should Avoid
- Overloading blocks with paint
- Pressing unevenly
- Using slippery surfaces
- Skipping test prints
- Rushing the drying process
Why Block Printing Is Still Popular
- Encourages slow, mindful creativity
- Sustainable and low-waste art form
- Deep cultural and historical value
- Perfect for DIY projects and handmade gifts
- Allows endless design experimentation
Creative Uses of Block Printing
- Printed fabrics for clothing
- Cushion covers and curtains
- Handmade greeting cards
- Gift wrapping paper
- Art prints and journals
- Table linens and wall hangings
Final Thoughts
Block printing on fabric and paper is more than a craft — it’s a meditative art that connects creativity with tradition. While the process requires patience and practice, the results are deeply rewarding. Each imperfect print tells a story of human touch and artistic expression. Whether you’re printing textiles or stationery, mastering the basics opens the door to endless creative possibilities.