
How to Build Simple Floating Shelves: A Step-by-Step Guide
Floating shelves are a stylish and practical way to add storage and display space to any room. Unlike traditional shelves with visible brackets, floating shelves appear to “float” on the wall, giving your space a clean and modern look. They are perfect for living rooms, kitchens, bedrooms, or even home offices.
The good news is that building floating shelves is a beginner-friendly DIY project. With a few basic tools and materials, you can create beautiful shelves that enhance your home décor and provide extra storage.
This step-by-step guide will walk you through everything you need to know to build simple floating shelves.
Why Choose Floating Shelves?
Floating shelves are popular because they are both functional and visually appealing.
Benefits of Floating Shelves
- Modern and minimalist appearance
- Saves floor space
- Provides extra storage and display areas
- Easy to customize for any room
- Budget-friendly DIY project
Whether you want to display books, plants, kitchen items, or decorative pieces, floating shelves are a versatile solution.
Tools and Materials You Will Need
Before starting your project, gather the necessary tools and materials.
Materials
- Wooden boards (for shelves)
- Wall anchors or heavy-duty screws
- Hidden shelf brackets or floating shelf hardware
- Wood screws
- Wood filler
- Sandpaper
- Wood stain or paint (optional)
Tools
- Drill
- Screwdriver
- Level
- Measuring tape
- Stud finder
- Pencil
- Saw (if cutting wood yourself)
Having the right tools prepared in advance will make the process smoother and faster.
Step 1: Measure and Plan the Shelf Location
Start by deciding where you want to install the floating shelves.
Tips for Planning
- Measure the wall space carefully
- Decide the shelf length and depth
- Consider what items you plan to place on the shelves
- Mark the desired shelf position lightly with a pencil
Proper planning ensures your shelves are both functional and visually balanced.
Step 2: Locate Wall Studs
Wall studs provide strong support for shelves, especially if you plan to place heavier items on them.
Use a stud finder to locate studs behind the wall and mark their positions with a pencil. If studs are not available where you want to place the shelf, use strong wall anchors.
Step 3: Install the Shelf Brackets
Next, install the hidden shelf brackets that will support the shelf.
How to Install Brackets
- Hold the bracket against the wall at the marked location.
- Use a level to ensure it is perfectly straight.
- Drill pilot holes into the wall or studs.
- Secure the bracket with screws.
Make sure the brackets are firmly attached and level before moving on.
Step 4: Prepare the Wooden Shelf
If your wood board is not pre-finished, you may want to prepare it before installation.
Preparing the Shelf
- Sand the wood to smooth the surface
- Fill any holes or imperfections with wood filler
- Apply wood stain, paint, or sealant if desired
- Allow the finish to dry completely
This step improves the appearance and durability of the shelf.
Step 5: Attach the Shelf to the Brackets
Once the brackets are securely installed, slide the wooden shelf onto the brackets.
Depending on the hardware you are using, you may need to secure the shelf with screws from underneath or inside the shelf.
Check again with a level to ensure the shelf is perfectly straight.
Step 6: Test the Shelf Strength
Before placing heavy items on the shelf, gently test its strength.
Apply light pressure to make sure it is securely attached and stable. If the shelf feels loose, tighten the screws or adjust the brackets.
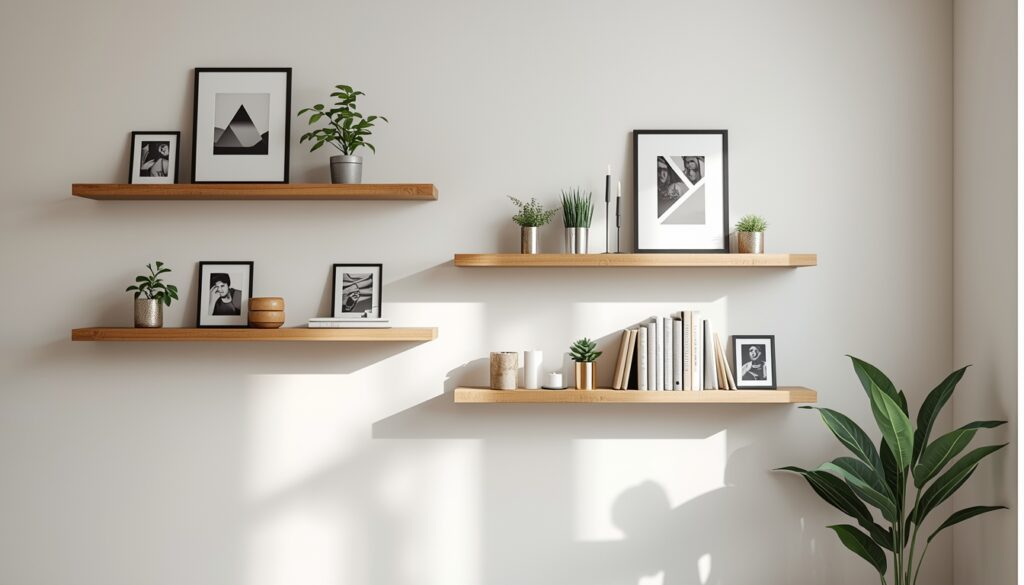
Decorating Your Floating Shelves
Once installed, you can style your shelves to match your home décor.
Ideas for Decorating Floating Shelves
- Display books and small plants
- Add framed photos or artwork
- Place candles or decorative objects
- Organize kitchen jars or spices
- Use baskets for storage
Combining practical storage with decorative items creates a balanced and attractive display.
Tips for Building Strong Floating Shelves
To ensure your shelves last a long time, keep these tips in mind:
- Use high-quality wood and strong brackets
- Always install brackets into wall studs when possible
- Avoid overloading the shelves with heavy items
- Use a level during installation for perfect alignment
- Measure carefully before drilling holes
Following these tips will help you build shelves that are both safe and durable.
Final Thoughts
Building simple floating shelves is a rewarding DIY project that can improve both the functionality and appearance of your home. With basic tools, a wooden board, and hidden brackets, you can create stylish shelves that look professional and modern.
Floating shelves provide valuable storage space while keeping your room organized and visually appealing. By following this step-by-step guide, even beginners can successfully install floating shelves and transform their living space.
With a little creativity and effort, your DIY shelves can become a beautiful and practical feature in any room of your home.