
Setting Up a Functional and Inspiring Craft Studio Space
A well-organized and inspiring craft studio can make a huge difference in creativity, productivity, and overall enjoyment of your projects. Whether you’re into sewing, painting, scrapbooking, jewelry-making, or general DIY crafts, having a dedicated space that balances functionality and inspiration is key.
The best craft studios aren’t just about storage — they’re about creating a space that motivates you to start projects, sustain focus, and explore your creativity fully.
Here’s a step-by-step guide to designing your ideal craft space.
Step 1: Choose the Right Location
The first step is finding the ideal spot in your home or studio space. Consider:
- Natural Light: Bright, natural light is essential for detail work like painting, sewing, or beading.
- Space for Movement: You need enough room to spread out supplies and move freely around your work area.
- Quiet & Focused Environment: Choose a spot where distractions are minimal and you can concentrate.
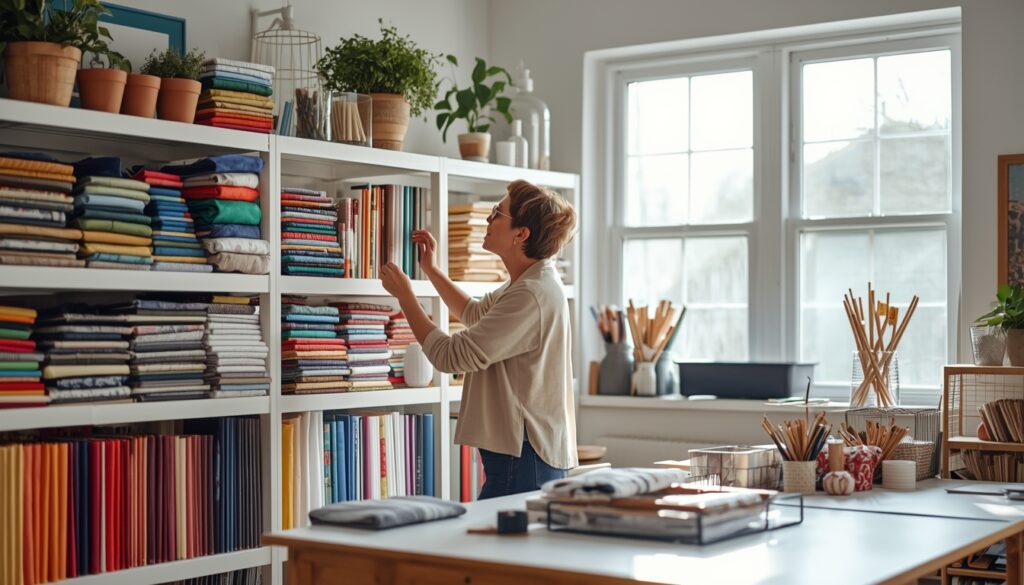
- Storage Potential: Look for a space where you can add shelves, cabinets, or drawers.
Even a small corner of a room can become a fully functional craft space with thoughtful design.
Step 2: Plan Your Layout
A functional studio balances work zones with storage. Typical zones include:
- Work Surface: A sturdy table or desk for your main crafting activities.
- Storage Zone: Shelves, bins, drawers, and organizers for supplies.
- Display & Inspiration Zone: A place to pin ideas, color swatches, or completed projects.
- Tool Zone: Easy access to frequently used tools.
Arrange zones logically so you can move efficiently between them.
Step 3: Optimize Storage Solutions
Organization is key in a craft studio. Consider:
- Clear Bins & Containers: Make supplies visible for easy selection.
- Pegboards: Hang scissors, rulers, brushes, and tools for quick access.
- Shelves: Use vertical space to store paper, fabrics, paints, and other materials.
- Drawer Organizers: Keep small items like beads, pins, or buttons tidy.
- Label Everything: Labels save time and prevent clutter from accumulating.
Storage should be functional but also visually pleasing to inspire creativity.
Step 4: Choose the Right Furniture
- Work Tables & Desks: Opt for adjustable-height tables if possible.
- Comfortable Chair: You may spend hours crafting, so a supportive chair is essential.
- Storage Cabinets: Closed cabinets help hide clutter while keeping items organized.
- Rolling Carts: Great for mobile supplies and flexibility in layout.
Invest in quality basics — they pay off in comfort and efficiency.
Step 5: Personalize Your Inspiration
Your craft studio should motivate you. Add:
- Inspiration Boards: Pin ideas, swatches, quotes, or magazine clippings.
- Lighting: Adjustable desk lamps or string lights can create a warm, inviting atmosphere.
- Decor & Color: Use colors that stimulate creativity or make you feel happy.
- Music Setup: A small speaker or headphones can make long projects more enjoyable.
Personal touches make your space feel welcoming and energizing.
Step 6: Maintain a Functional Workflow
A great craft studio is not just about looks; it’s about smooth workflow:
- Keep frequently used tools within arm’s reach.
- Sort projects by stage: “in progress,” “completed,” “to start.”
- Clean your workspace at the end of each session.
- Rotate supplies seasonally or based on ongoing projects.
Efficiency and aesthetics go hand in hand.
Step 7: Budget-Friendly Tips
- Repurpose old furniture as worktables or storage.
- Use jars, baskets, or shoeboxes for organizing small items.
- Shop thrift stores for inexpensive shelves or carts.
- DIY inspiration boards using cork or pegboards.
Even small spaces can feel luxurious and inspiring with smart planning.
Step 8: Safety & Comfort
- Proper Ventilation: Especially for paints, glues, or sprays.
- Ergonomic Setup: Avoid long-term strain by positioning your chair and table correctly.
- Non-Slip Mats: Protect flooring and provide comfort.
- First Aid Kit: Always handy in a craft space.
A safe, comfortable environment encourages longer creative sessions.cisions.m at home.
Final Thoughts
Creating a functional and inspiring craft studio is a balance of organization, ergonomics, and personal style. It’s about giving yourself a space where you can focus, explore, and enjoy your creative passions.
Even a small corner of a room can become a haven of productivity and imagination. With thoughtful planning, clever storage, and a touch of personal flair, your craft studio can become a place where ideas come to life, projects flourish, and your creative energy thrives every day.
The key is consistency: keep it organized, maintain your workflow, and continually add elements that inspire you. A well-designed craft space doesn’t just hold your tools — it fuels your creativity.